Tag Archives: Tips

Solo Female Travel Hacks that you need to know.

Solo Female Travel Hacks from the experts, what to do, how to stay safe while travelling alone and how to enjoy without getting into any trouble, all this and more in this post!

Solo Female Travel Hacks that you need to know.

Over the years, I’ve featured dozens of travel tips and destination guides for the solo female traveler, but I wanted to put together a comprehensive female travel resource for everyone. Whether you are a first-time solo traveler looking for that extra push to take their first trip or a seasoned solo traveler… Solo Female Travel Hacks

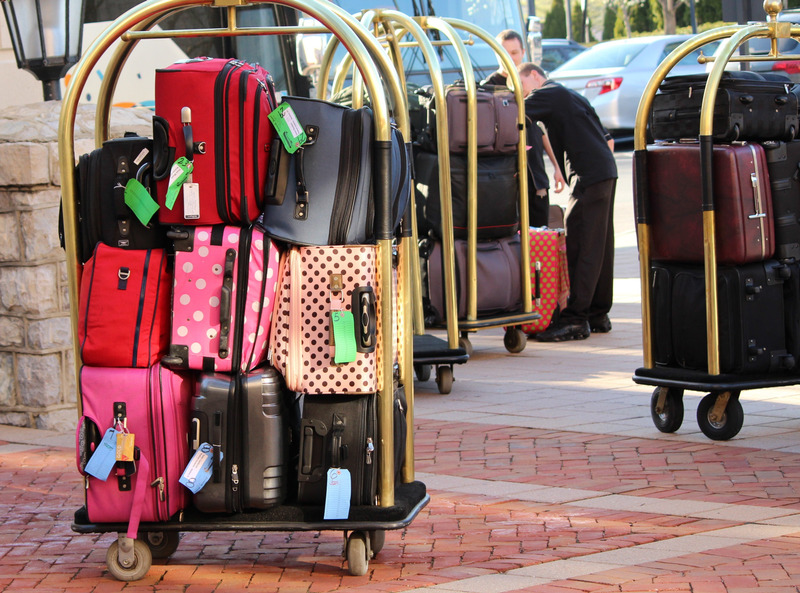
Hostelworld, the largest online hostel-booking platform, has seen a growth in female solo bookings of 45% between 2015 and 2017.

Solo Female Travel Hacks that you need to know.

Some of the Tried and Tested Hacks:

1. Choose your destination wisely and plan accordingly-

Spend sometime in deciding the destination and plan accordingly. What is Fun in one country might be A Sin in another.

2. Take help of Apps for created for Women Safety-

There are plenty of apps on Google Play and App Store that are created keeping in mind women safety while travelling. Make use of such apps.

3. Do your research before you reach-

Planning is the key to a successful and safe trip. Read reviews, talk to people who have visited that place before,connect to locals, etc.

4. Ensure you don’t run out of battery on your phone-

I understand that one should not be dependent on technology always but let’s face it, our phone (most of the times!) makes things easier. Invest in a good power bank and ensure that you don’t run out of battery.

5. Inform someone about your itinerary/schedule-

Have at least one friend or family member who knows your itinerary in and out. Ensure that you inform him/her in case there is any last minute changes in your plan.

6. Write down important phone numbers-

Mobile phone has made our life so much easier but at the same time it has made us dumb! We no longer remember important contact numbers! Ensure that you write down all such important numbers somewhere.

7. Carry important medicines and your first aid-

As they say, hope for the best but prepare for the worst. Carry basic medicines and your first aid kit with you.

8. Keep a scan copy of all the important documents on a cloud storage-

Always carry a clear scan copy of all your documents, including your tickets, visas, etc. on a cloud storage that you can access from any PC.

9. Keep an eye on your drink (ALL your drinks- not just the alcoholic ones)-

It’s fun to make new friends and share a drink or two but keep an eye on what you are drinking. Adulterating soft drink/juice with drugs is very easy, don’t fall a prey to such things.

10. Be adventurous but be prepared-

Being cautious doesn’t mean that you miss out on all the fun, it means you always ensure that you are better prepared to face any unwelcoming situation. Prepare yourself for such situations so you are not left clueless.

11. Don’t neglect your gut feeling-

if something doesn’t feel right, it probably isn’t. Trust your gut feeling, avoid places or people you feel are not safe. Remember, better be safe that sorry.

12. Trust but verify-

I would want to emphasize on this again, just because you are being cautious doesn’t mean that you stop interacting with people or stop having fun. Trust people but always do your own research, avoid trusting people blindly.

Got any Solo Female Travel Hacks? Let me know in the comments below!  

Potato for Skincare. Scars, Acne, etc.

One ingredient for skincare. Potato is much more than fries and chips people, learn how to use it for Scars, Acne and Anti Aging.

Potato for skincare

Next time someone calls you a couch potato, or may be just a potato, don’t get mad, ’cause in my opinion Potato is the King of the vegetables! Frankly speaking, it is the only vegetable that everyone eats (in some way or the other!) I remember every time I was asked to finish my veggie-bowl as a kid, I would eat only potatoes and then be super happy about it! Do you know you can use Potato for skincare. Learn how to use it for treating acne, for reducing scars and even for anti-aging.

So everyone in the house, throw your hands up in the air and say with me, Which vegetable gives you fries? Potato! Which vegetable gives you Yummy Chips? Potato! Guess what, which vegetable can give you flawless complexion? Yes people, it is our very own own, our favorite Potato!

Grated potato for skin

Why is Potato Good for Skin?

  • Potatoes contain ‘catecholase’ enzyme which can help in reducing dark spots, blemishes and acne scars.
  • The presence of mild bleaching properties reduces the melamine production, lowers hyper pigmentation and lightens the skin effectively.
  • It contains potassium which helps in keeping the skin hydrated.
  • It has vitamin B6, which helps in new cell formation.
  • It contains magnesium which fights with free radicals that cause wrinkles.

How to use Potato for skincare?

  • Oily Skin Mask:  Peel and finely grate a potato, then add rosewater (alternatively you can add rice water or plain water) and mix thoroughly. Add 1 tsp lemon juice and apply to face for at least 15 minutes. (Tip: You can dip the face mask sheet in this juice and then apply it on your face)
  • Dry Skin Mask: Everything stays the same as above, but instead of lemon juice, add 1 tsp of honey or yogurt.
  • Anti-Ageing Mask: Potato paste with Greek Yogurt or plain yogurt (This also works as a hydrating mask).
  • Firming Mask:  Mix well 1 egg white and juice from half a potato, apply it evenly on the skin. Leave on for 20 minutes, then rinse thoroughly with cold water.
  • Hydrating and nourishing Mask- Peel and Grate 1 potato and mix it with 2 Tbsp olive oil, then add 1 Tbsp honey. Mix thoroughly, then apply to the skin. Leave on for 10 minutes, then rinse thoroughly.
  • For Sun Burn- If you are a beach baby and sun is your idea of fun like me then you probably know the after effects of spending a sunny day on the beach! Fear no more darlings, our hero, Mr. Potato comes to our rescue here again! Potato cures the sunburns. Take the potato slice and rub the potato slice on the sunburn are for 5 minutes. Then wash the face and skin with cool water.

Learn more here.

Happy Masking! Want to learn more skincare hacks and home remedies? Click here!

Mastering the art of travelling light.

Travelling should rejuvenate you, not wear you down. With all the backpacks and luggage you bring with you, travelling becomes tiring, which is wrong. In this post learn Hacks and the art of travelling light.

Travelling should rejuvenate you, not wear you down

I  remember the time when I traveled from my home to my hostel (hardly 3 hours flight) carrying 3 trolleys, 1 tote bag 1 handbag, 1 huge backpack and 1 small purse around my waist… just in case…  (it’s hard to come to terms with the fact that I carried my favorite pillow, and few empty Tupperware boxes with me!) and still had to Buy More Stuff after reaching the hostel! Over the years I have or let’s say I am trying to master the art of travelling light (Minimalism anyone?)

Minimalism is a tool to rid yourself of life’s excess in favor of focusing on what’s important—so you can find happiness, fulfillment, and freedom.

Let me tell you, it is Not easy but then it is not impossible as well! So keep humming the song from ColdPlay, “Nobody said it was easy, No one ever said it would be this hard.”  and let’s get this done!

First of all, why do I need to travel light after all? Well, of course, no one will stop you from travelling with N number of bags but then if you travel light you have your own benefits.

Advantages of Travelling light:

  • Ease of travelling on public transport.
  • Fewer chances of losing your baggage.
  • Tension-free travelling.
  • Option to Stay in hostels.
  • You are (always) better prepared for impromptu plans.
  • You are more of a Traveler than a Tourist.

Believe me, once you start travelling light or start Backpacking, you will never touch that trolley again! Backpacking is a way of life and it is addictive, for good!
To start with you need to choose a backpack that is not too big nor too small, but then again the size of the backpack depends on a number of factors (duration of stay, the place you are travelling to, activities you want to do, so on) 

Step 1- Make a List.

No matter how old school it may sound, if you are new at it I kid you not, get a pen and paper or create a new memo in your phone and make that damn list! It need not be in great detail just put the bullet points and write down everything you have to carry.

Step 2- Find and Strike

Yes, you heard that right, strike off everything that you can live without! I know it sounds stupid but do it anyway! Strike off those 3 cashmere sweaters, 1 sweatshirt (or cashmere sweater if you insist!) is good enough!Tip: Follow- Wear heavy, carry Light. It means you wear heavy clothes like jeans and carry lightweight clothes, like, let’s say shorts, cotton pants, etc.

Step 3- Divide and Rule.

Divide your list into “Need it”, “Might need it”, “Emergency”. Your essentials go in the 1st list, your extra pairs of everything goes in second and things like first aid, tools etc. goes in 3rd. Learn how to pack light here.

Step 4- One Plus One.

Everything needs to go in one bag, Yes, you heard that right! I am gonna be a little lenient and say one plus one but this doesn’t mean that you carry two huge backpacks! One Plus One rule means you carry one backpack and one small bag for passport, cash, mobile, etc.

Step 5- Bring back only pictures.

This step isn’t very easily digested by some (most of them!) but believe me it is something you will thank me later for. We all have clothes that we want to give away that can be tossed away without hurting much. Carry Such Clothes, give them away after using them so with every passing day your backpack starts becoming lighter. (Bonus: You can use that extra space for souvenirs!)

Step 6- Smaller the better.

“Thou shalt never carry those toiletries with you!” Ladies, take a break from makeup don’t carry that mascara and that perfume with you if you plan to travel light! You can buy cheap body lotions and soaps where ever you go. In case you really need to take it with you then make use of those free samples that you stocked up from Boots! Alternatively, you can squeeze out a little bit from the big bottle and carry the body lotions, etc. with you. Travel essential bottles are easily available in stores.

Step 7- Prepare for the best!

Lastly, the most important step is to prepare for the best! Don’t assume things and don’t pack for ‘What if’s” No heaven will fall if you leave behind anything, and thanks to globalization Everything is available Everywhere! Keep in mind your destination, the activities you plan to do and pack accordingly.

Are you a travel junkie looking for some cool travel hacks? Learn how to travel for Free! Yes!

Bon Voyage!

How to use dried flowers, learn “Flower-Power”.

Learn how to use dried flowers to get beautiful skin and healthy hair.


Learn how to use dried flowers to get beautiful skin and healthy hair.

Ayurveda has always given importance to the healing properties of flowers, besides their intoxicating aromas. This is mainly because many of them have incredible properties that can be used as natural remedies. In this post, I am going to share my Top 3 flower-power that I have personally used and found beneficial.

Here I have covered topics like How to make D.I.Y skin toner, How to make hair rinse that prevents hair fall, Where to buy flowers in UAE and How to check if the flowers you are buying are authentic.

Dried Rose Buds

Rose: 

Fights dryness, reduces redness and regenerates ageing skin.

Nicknamed the “queen of all flowers,” a rose is one of the most famous flowers, apart from expressing love to our near n dear ones do you know rose can also be used to bring back that youthful glow! Its hydrating properties and its ability to heal broken blood vessels help in fighting signs of ageing. You can order dried rose here.

How to Use: 

Take crushed dried flowers and a few drops of honey, apply it to your lips for a while, it works as a natural lip balm. Prepare DIY rose water by boiling rose petals in distilled water. Crushed petals can also be applied as a face mask. You can buy Organic dried rose petals here.

Dried Chamomile Flowers

Chamomile: 

Anti-inflammatory, soothes and improves skin elasticity

Most of us are familiar with chamomile in the form of Tea and its soothing effect, which helps in inducing sleep. In many ancient medicinal practices, it is credited for incredible properties, including beauty. If you suffer from puffiness around the eyes, make a strong infusion of chamomile flowers and use as a compress under the eyes. It also helps relieves general weariness and puffiness.

It helps in calming the skin while also improving skin elasticity. Chamomile is suitable for all skin types and makes your skin tone evener. It helps in combating age and sunspots and helps to improve the appearance of hyper-pigmentation. It’s full of antioxidants, which help to fight breakouts.

How to Use:

Take dried flowers or freshly picked chamomile petals, milk and honey and apply this mix as a face pack for 5 minutes. It works as a natural cleanser, regular uses can remove the blackheads and pigments of your face. You can also brew a strong tea, let it cool down and then use it as a toner. Alternatively, you may use this tea in your face-masks as well.

Dried Hibiscus petals

Hibiscus: 

Revives skin and acts as an exfoliator and antioxidant

Commonly used in Ayurvedic practices and a key ingredient in Chinese medicine, the hibiscus flower effectively revives the skin since it’s plentiful in anti-ageing alpha hydroxy acids (AHAs) and amino acids. The skin-perfecting benefits of hibiscus are endless—it exfoliates, protects against premature ageing, tones, firms, hydrates and controls oil production—and is sometimes used in anti-cellulite creams and serums. Hibiscus is also revered for its scalp-replenishing and blood circulation–stimulating abilities. You can order it here.

How to Use: 

Take 10 to 15 petals from dried flowers, wash them carefully and boil them in a pan till the water left half, cool it and rinse your hairs with that extract: do it for at least two weeks, you’ll see some instant changes. It is good for hair growth, reduces hair loss and makes your hair shiny.

How to make D.I.Y skin toner?

This is my personal favourite, I have stopped buying toners and rose water altogether!

Steps:

  1. Take 500 ml of mineral or distilled water.
  2. Take 2 handfuls of rose petals (You can add Hibiscus leaves if you want for added benefits)
  3. Make sure that the leaves you are using are free from dirt or any other impurities.
  4. Boil the water with leaves at low flame till only half of the water remains.
  5. Let it cool down.
  6. Strain out the leaves.
  7. Store in a glass bottle and refrigerate.
  8. Additionally, you can store it in a spray in a bottle (I buy mine from Amazon, buy it here) and your Facial mist is ready!

Your homemade rose water/toner is ready to use! You can use it alone or with face-mask. Dip a cotton ball and clean your face with this toner at night for blemish-free skin.

How to make a hair rinse that prevents hair fall?

Accept it we all want a magical tip that is not too hard to follow but gives us amazing result, your search ends here! This easy-peasy hair rinse will make your shinier and healthier. Use it at least for 2 months to see the best results. Hibiscus helps to soothe scalp irritation, lessen grey hair, and reduce hair loss.

Steps make D.I.Y hair rinse:

  1. Boil handful of Hibiscus Petals in about 1000 ml of water.
  2. Let it simmer on low flame for 10 min.
  3. Let it cool, strain and store in a glass bottle.
  4. Use it as a final rinse.

Caution: If your hair colour is light, using this rinse might make your hair little reddish. Substitute Hibiscus with chamomile if you have light colour hair or want to make your hair lighter in shade.

Where to buy flowers in UAE?

I buy my flowers from Amazon, Carrefour or Spice Souk (be careful they sometimes overcharge as the market is full of tourists) if it goes out of stock! You can buy it any store that sells Tea. I always prefer to use flower instead of Tea Bags, but if you can’t find it anywhere then you can start off with Tea Bags.

How to check if the flowers you are buying are authentic?

The petals should be free from dirt or any impurities. The flowers should smell good and not rotten (obviously!) Try to crush few buds or petals in your hand and then smell it. The flower should not be stored in open (in spice souk this is the most common problem, hence I now buy these from Amazon (check the links I have put in the blog post)

Let me know if you have any questions/doubts/anything! You can read more tips here.

15+ fun ways to use Oranges for skin and hair Care!

When life gives you oranges, use them wisely! Learn how to use Oranges for Skin, Hair and Health.

Learn how to use Oranges for Skin, Hair and Health.

It all started as a fun experiment when I bought way too many oranges and decided to include them as a part of my weekly skincare routine. This fruit is extremely versatile (juices, smoothies, ice-creams, salads, skin tonic, hair rinse, bath soak, I can go on and on!) everyday I was surprised by the number of uses it had!

So without wasting much time, let’s get started!

How to use Oranges for skin-

1. Removes Tan-

The peels of this amazing fruit can remove your tan and sunspots. All you need to do is crush the peels and powder it. Add some yogurt and apply all over the face. Scrub gently and leave for fifteen minutes and then wash it off with cold water. You will be surprised when you see the results!

2. Anti-Ageing

As we know, orange is filled with the goodness of vitamin C, which increases the production of collagen and keeps the skin firm and moist.

An effective way to combat signs of ageing is by using some oranges. The free radicals in this fruit will definitely reduce the sagging of cheeks and reduce the wrinkles significantly. You can also use the peels for a mask. Given some time, you will slowly start witnessing miraculous changes in your skin.

3. Acne and scars

Mash the grated orange peels to apply on your acne and scars. When applied regularly on acne and pimples, orange helps in reducing acne/pimples and blemishes.

4. Facial Mist

You can prepare a skin refreshing spray with orange peels. Pour boiling water over the orange peels and keep it on for one day. Next day, strain the liquid and let it sit overnight. Apply this liquid on your face with the help of cotton pads; or use a spray bottle and use it as a facial mist. Wash it off after 20 minutes in case you feel sticky. This gives a soft and glowing touch to your face. You can use this liquid in your regular face masks too.

5. Instant Glow

Take juice of 2 oranges and put it in ice cubes tray. Then rub the frozen orange cubes on your face to spruce up and brighten your dull and lackluster face. This frozen orange juice benefits by refining your pores and reducing the oiliness of face to control acne. It is one of the most important benefits of applying oranges on the face.

6. Body scrub

Dry orange peels in the shade. Grind and mix it with chickpea flour, turmeric and coffee for a natural exfoliating cleanser that can be used on face and body. Not only this makes the skin smooth but also removes unwanted tan and evens out the skin tone.

7. Hydrating Mask for dry skin-

Mix Orange peel powder, almond, honey and milk. Wash off with cold water after 15 minutes. Regular use will remove dry skin patches and make the skin hydrated.

8. For oily and combination skin-

Mix Orange peel powder, clay, sandalwood powder in orange juice. Wash off after 15 minutes. Regular use will remove excess oil and get rid of uneven skin tone.

9. Glow pack for body and face-

Mix Orange peel powder, turmeric, chickpea flour, almond powder, rose water, pinch of cinnamon (Leave out cinnamon if you have extremely sensitive skin). This powder can be kept as a ready to use body or face scrub, mix with rose water or milk or plain water before use.

10. Anti acne and blemish pack

Mix Orange peel powder, pinch of cinnamon, pinch of nutmeg powder, pinch of turmeric, Neem powder (or grate fresh leaves), fullers earth, mix with Rose water or orange juice. Leave for 15 minutes then scrub it off gently. Regular use will remove blemishes, reduce appearance of acne, pimples and black heads.

Now that we have learnt how to use Oranges for skin, let’s see how we can use oranges for Hair.

Oranges for skin and hair

Oranges and Hair care-

11. Hair Conditioner:

You may also use oranges as an excellent hair conditioner. Just mix orange juice with honey (just 1 teaspoon else it will be difficult to wash off) and water. Mix this paste well and then apply all over your hair after shampooing. You may let it stay for five to ten minutes. Use water to wash your hair.

12. Hair rinse:

Pour boiling water over the orange peels and keep it on for one day. Next day, strain the liquid. You can use this liquid on the hair as last rinse to get rid of dandruff and get shiny hair.

13. Hair Rinse (2)

Soak orange peels in Apple Cider Vinegar and use as a hair rinse!

14. Hair Mask:

Take some oranges, make a fresh paste and apply this paste all over your hair. Make sure your hair is already oiled well. Now keep this mixture on your head for about half n hour and then rinse thoroughly with cold water. Use an herbal or mild shampoo to use wash your hair and then condition it well. You will be amazed by the results!

15. Hair Growth:

Oranges are also essential for healthy hair growth. It is rich in Vitamin B12 and Vitamin E which is very important for long, thick and beautiful hair. In order to get the best results, you may simply oil your hair first. After that, apply a fresh paste of oranges and honey all over your hair and let it stay for half n hour. Rinse with water and wash with a mild shampoo. This will help you fight hair thinning and hair balding.

16. Dandruff:

Did you know that oranges are all you need in order to get rid of dandruff? All you have to do is take the juice of orange peel and use the pulp for your scalp. This will remove dandruff and cleanse your scalp easily. You can also try another simpler method. This would be boiling the orange peels in water and rinsing your hair with it after it has cooled down. Filter the liquid and use it every time you are about to shampoo.

17. Anti hair fall mask

With the total of 4 ingredients to be added, this mask still qualifies to be called “easy”! Take one lemon and a half of an orange, add one tablespoon of coconut oil and finish off by mixing in two tablespoons of crushed green tea leaves. Let the mixture rest for about 30 minutes to one hour then apply it to your hair and leave on for 30 to 40 minutes. Wash off and say hello to healthy and beautiful hair!

Have a tried and tested tip? Tell me!!

Turmeric Milk- The winter elixir

Hey there, winter warriors! As the icy winds sweep in, I find myself reaching for the cosiest of beverages to ward off the chill. And guess what’s become my go-to winter elixir? You got it – turmeric milk! This golden delight not only tastes awesome but has also has some amazing health benefits.

Did you know, the Turmeric Latte, a.k.a. fancy pants turmeric milk, from Starbucks can be very easily prepared at home! What’s more, you can adjust the taste according to your liking, doesn’t burn a hole in the pockets and ofcourse is way more nutritious than Starbucks!

Let’s talk about the Starbucks Turmeric Latte obsession – guilty as charged. I found myself on a first-name basis with the barista, who affectionately started calling me the “Turmeric Maestro.” It became a thing, and now I proudly strut to the counter, chanting my order like a winter mantra – “One grande Turmeric Latte, please!” I remember taking the first sip and thinking to myself, “Why haven’t I been sipping on turmeric milk all my life?” Now, I’ve made it a point to incorporate homemade turmeric milk every time I need to boost my immunity, and let me tell you, it does wonders. I started dubbing it my “liquid sunshine” because, let’s face it, the winter sun is often more myth than reality.

Here’s the kicker – my attempt at making turmeric milk at home for the first time turned into a kitchen comedy. As I clumsily attempted to mix turmeric, milk, and a dash of sweetness, my kitchen looked like a spice bazaar explosion. Note to self: turmeric can be a bit mischievous when not handled with care.

Recipe for Turmeric Milk aka Liquid Sunshine

  1. 1 cup milk (dairy or plant-based)
  2. Organic Turmeric (Fresh or organic powder)
  3. Saffron
  4. Cardamom
  5. 1/2 teaspoon cinnamon
  6. A pinch of black pepper (for better absorption of curcumin)
  7. Sweetener of your choice (honey, maple syrup, or agave) to taste
  8. Optional: A dash of ginger for an extra kick

How to Prepare Turmeric Milk

  1. Heat the milk in a saucepan
  2. Add all the ingredients like turmeric, cardamom, cinnamon, black pepper, and ginger (if using). (Order Organic Turmeric here)
  3. Add 3-4 strands of Saffron (You can order it here)
  4. Whisk the ingredients together until well combined.
  5. Start heating the milk on low flame (the lower the better, we want to make sure that we extract all the goodness of the ingredients)
  6. Remove from heat and add sweetener to taste.
  7. Strain the mixture if desired and enjoy your cup of homemade turmeric milk!

Optional:

You can add dry fruits like Almonds, dates etc. if you like.

Health Benefits of Turmeric Milk:

  1. Immune System Boost: Turmeric milk, with its curcumin content, supports and strengthens the immune system, helping you fend off winter illnesses like colds and flu.
  2. Anti-Inflammatory Properties: Combat winter joint pains and stiffness with the anti-inflammatory magic of turmeric, providing relief from aches and pains.
  3. Warming Effect: The natural heat-generating properties of turmeric make it an ideal beverage to keep you warm from the inside out, helping you combat the winter chill.
  4. Better Sleep Quality: Enjoy a restful night’s sleep with a cup of turmeric milk before bedtime, thanks to its compounds that promote relaxation and reduce anxiety.
  5. Digestive Aid: Turmeric aids digestion and soothes the digestive tract, making it a perfect post-meal drink to combat winter bloating.
  6. Skin Radiance: Keep your skin glowing during winter by harnessing the antioxidants in turmeric, preventing dryness and maintaining a healthy complexion.
  7. Mood Enhancement: Turmeric’s connection to serotonin and dopamine production can lift your spirits during the winter blues, contributing to an improved mood.

Conclusion:

As winter wraps us in its chilly embrace, embracing the warmth and goodness of turmeric milk can be a delightful and healthful choice. From bolstering your immune system to promoting better sleep and enhancing your mood, the benefits of this golden elixir extend far beyond its delicious taste. So, why not savor a cup of turmeric milk this winter and let its golden magic work wonders for your well-being?

To sum up the benefits of Turmeric Milk:

  1. Antibacterial
  2. Anti-ageing
  3. Improves skin texture and makes your skin glow!
  4. Improves immunity
  5. Eases menstrual cramps and pain
  6. Purifies blood
  7. Helps in sleeping like a baby (that’s what my mum claims!)

Last but not least, do not expect an overnight miracle, natural remedies take time, so be patient!

Word of caution:

Here are a few side effects and risk factors associated with turmeric milk, which when ignored can cause problems:

  • Check for allergies before you consume Golden Milk or Turmeric Milk.
  • Don’t go overboard with this Golden drink.
  • Pregnant women should avoid taking too much of turmeric.
  • Turmeric may interfere with certain medications, so those taking anticoagulants like aspirin should totally avoid it. They can also interact with nonsteroidal anti-inflammatory drugs (NSAIDs).
  • Consult your physician before you start drinking turmeric milk.

You can read more such tips here.

Vitamin E and why is it called the Miracle Oil

A complete guide to cover “What, Why, Where, When and How” of this amazing oil.

A complete guide to cover “What, Why, Where, When and How” of Vitamin E!

What is it-

Vitamin E dissolves in fat. It’s a deficiency, is rare and usually due to an underlying problem with digesting dietary fat rather than from a diet low in vitamin E, can cause nerve problems. The crucial function played by it makes it a vitamin that is poorly understood, but may involve antioxidant functions in cell membranes. It is a nutrient that’s important to vision, reproduction, and the health of your blood, brain and skin.

This miraculous oil also has antioxidant properties. Antioxidants protect your cells against the effects of free radicals — molecules produced when your body breaks down food or is exposed to tobacco smoke and radiation. Free radicals might play a role in heart disease, cancer and other diseases. If you take it for its antioxidant properties, keep in mind that the supplement might not offer the same benefits as naturally occurring antioxidants in food.

Why use it-

Although it is still very debatable but Vitamin E is considered extremely useful. Some people use it for treating and preventing diseases of the heart and blood vessels including hardening of the arteries, heart attack, chest pain, leg pain due to blocked arteries, and high blood pressure.

Always ensure that you buy good quality and pure vitamin E, bad quality products do more harm than good. You can buy organic vitamin E oil here online.

It is also used for treating diabetes and its complications. Women use it for preventing complications in late pregnancy due to high blood pressure, premenstrual syndrome (PMS), painful periods, menopausal syndrome, hot flashes associated with breast cancer, and breast cysts. It is also an antioxidant. This means it helps to slow down processes that damage cells.

When to use-

Vitamin E’s deficiency is rare but it might happen due to an underlying problem with digesting dietary fat rather than from a diet low in it. You can apply it if you have dry and damaged skin/hair.

Where to use-

It can be taken orally and it can also be applied directly to the Skin/Hair or Nails.

How (to use)-

For Hair:

  1. Mix the contents of 1 vitamin E capsules in 1 tbsp of Organic Olive oil. Massage the mixture onto your scalp using your fingertips in circular motions. Leave it for 30 minutes, wash off. 
  2. Mix Vitamin E, Egg Yolk and Organic Coconut Oil (Order the one that I buy and trust here) Massage the scalp. Leave for an hour and then wash off.
  3. Add Aloe Vera gel and Rosehip oil (Order online my trusted brand here) to your vitamin E oil and apply this mixture thrice a week on your hair. Your hair will never look dull and lifeless again.  
  4. A hot oil treatment combining coconut oil, almond oil and vitamin E oil is one of the most effective and easiest ways to stop hair fall. Take 2 tablespoons of vitamin E oil, almond oil and coconut oil. Warm it gently and then massage onto your scalp in circular motions so that the oil penetrates into the scalp. Leave it overnight and wash it in the morning. This ritual works wonderfully both to curb hair fall and stimulate hair growth.  

For Skin and Nails:  

  1. For Dry skin- Massage Vitamin E after cleaning your face at night. Helps in moisturising the skin and hydrates the skin.
  2. For Marks- Aloe Vera with Vitamin E. Use this as a night cream, helps in improving the texture of the skin, also helps in reducing marks.
  3. For Under Eye- Mix almond oil and Vitamin E oil in 1:1 ratio and use this as a cheap and effective substitute for under eye cream.

Important Note-

This oil’s benefits are primarily cosmetic and have limited scientific support. Before using anything new, always consult a doctor or skincare expert.

You can read some amazing tips related to skin and haircare here.

Get those long dramatic lashes at home.

An eyelash serum that’s Chemical-Free, costs less than 1/10th of the normal price and something that actually WORKS (Tried and Tested!)

P.S. This post by no means wishes to throw shades or deteriorate any brand/product. I love trying new brands, products and respect them all! Peace bro! LoL

Everyone says, “Life is too short to have short lashes.” but then no one tells you how to get those long lashes (Not talking about the falsies here!) By the end of this post, I promise to spill the beans on to how to get those long dramatic lashes without burning a hole in your pocket! Yes, we are going to learn how to make eye lash serum for long/dramatic lashes at home.

Some of the things you will learn in this post:

  • Why same products from different brands cost so much?
  • Why make your own product?
  • How to make a lash-serum that’s chemical-free, costs less than 1/10th of the price (In fact, it will cost you 1/100th of the cost! Yes!!) and a serum that actually WORKS (Tried and Tested!) (You’re welcome!)

Why same products from different brands cost so much?

Ever bought a product from a fancy brand and realised it does exactly the same thing that the product from your humble drug-store brand did (and costs you half the price!) Ouch! That hurts!

Picture this, you have been using this expensive product religiously and it DID NOTHING whereas you start using a home-remedy that your mama told you about and it WORKS LIKE A MIRACLE!

What I am trying to convey here is, we often feel that if a product costs a fortune it is bound to be amazing, whereas if you picked it up from a drug store, or perhaps you made it on your own it is not going to be that effective. Let me tell you, this NOT TRUE! 

Lately, I started making my own (basic) products and my happiness knows no bounds! Not only I have the full control over the quality and ingredients, but I am also free to make a fresh batch as per my requirement. I play around with the ingredients according to what am I aiming at, there are no chemicals, no animal testing (A lot of testing on humans though! LoL) and yes they are a lot cheaper as compared to some of the “natural brands” available in the market.

I am not saying every product I made turned out to be perfect, many products went down the drain, many never saw the light of the day, but you learn from your mistakes, right?!

Why do products from so-called high-end brands cost effing so much?

Remember, when you’re buying something you are not only paying for the product but also for the company. It’s not just the cost of ingredients they have to cover but a whole heap of other expenses, as well, like, manufacturing, staff, marketing, certification and other business overheads, just to name a few. And of course, the business needs to make a healthy profit so that is added to the list as well!

Why make your own product when you can buy one?!

I know it is so tempting to buy all those products who claim to have miraculous effects and some even come with a guarantee! One look at the price tag and your heart begins to sink! It is not just the price but a number of facts that you need to pay attention to while selecting a product. All those nearly-impossible-to-pronounce ingredients that we pay no heed to.

Most commercial skincare products like to use a lot of oils/natural ingredients for marketing purposes. They are usually included at a very small percentage, often for marketing purposes rather than to offer much skin benefit. When you formulate and make your own products you can make them for a lot less (Read: WAYYYYY LESS, sometimes just a fraction of the price!) AND you could also increase the percentage of those exotic ingredients used, which means better and quicker results! (Yayy) 

Talking about Cost-

It’s fascinating to calculate how much the product would cost you to make at home versus buying them from a high-end brand. I didn’t take into consideration the wastage of ingredients or any other overhead like time/equipment. These products are quick and easy to make and require minimal equipment or time.

The costs of ingredients obviously vary from one supplier to another and from one country to another. The price I have calculated therefore would vary depending on which country you are in and supplier you use, but even allowing for this, you’ll see just how much cheaper it is when you make your own! Cost for a decent lash serum varies, it starts from 100 AED for 3-4 ml (35 USD approx) and goes up to 800 AED (217 USD approx). The cost of the serum I was using was for 255 AED (70 USD approx). The results were amazing, no doubt, but I was always worried about the ingredients, the side-effects, not to forget the cost, it was something that got me worried that most! LoL

Stunning result of home made eye lash serum

Breakdown of Cost for our home-made serum for long lashes:

  • Castor Oil (for 120 ml)- 40 AED (Buy it here)
  • Vitamin E Oil (for 75 ml)- 80 AED (Buy it here)
  • Re-used old mascara bottle- Free (Alternatively you can buy empty mascara container here)

Total- 120 AED ( 32 USD approx) for approx 195 ml of serum.

Using simple maths it comes to (approx) 24 AED for 4 ml of serum! *Mind blown away!*

Our serum will cost- Approx 24 AED ( 6.50 USD) for 4 ml

Normal Cost of serums- 250 AED (68 USD) for 4 ml

Now, How to make your own Lash Serum:

Well, the steps are ridiculously easy! However, pay attention to the cleanliness, storage and application part.

Things you’ll need-

  1. Castor Oil
  2. Vitamin E Oil
  3. Optional: Almond oil (Order it online here)
  4. Empty Mascara container (You may buy an empty container from Amazon, etc. Alternatively, you can clean and use the old mascara, remember to clean it properly so that no residue is left.)

Steps:

  1. Add Castor oil and Vitamin E oil in equal proportion.
  2. Use a dropper to add the oils to the mascara container.
  3. Shake it vigorously to ensure that the oil is mixed properly.
  4. Close the container and store.

How to use:

For best results, use this twice a day. You may use it before going to bed. Apply it like how you apply your mascara, starting from the root till the tip. Give attention to the roots, the lashes should be covered in the serum. However, don’t overdo it, you don’t want the serum to go inside your eyes! Wash with cold water if it does!

Visible results from second week itself. However, results may vary from person to person. Stop using it immediately in case of irritation or discomfort.

Storage:

Pay attention to cleanliness, don’t touch the brush with dirty hands (Who does that!) Don’t share it with anyone to avoid eye infection, diseases.

Learn more such awesome tips and tricks here!

How to use Neem for Skin and Hair

There is a reason why Neem tree is known as “The Miracle Tree”. Read on to know how to use Neem for Skin and Hair.

How to use Neem for Skin and Hair

While vacationing in India, every time I tried something new (and it worked!) in my mind I was like “I HAVE TO share this with everyone!” I came across some of the most amazing (natural) skin and hair care products that are not only cheap but are also readily available. On my recent trip to India, the land of Ayurveda, I went on a shopping spree for herbs and natural medicines, I bought around 16 (Yes!) different kinds of herbs, I have already started using most of them and can’t wait to share the results with you all.

In this post, I will be talking about Neem, the Miracle Tree, and how to use Neem for Skin and Hair. It’s funny and sad at the same time, how we buy any product that claims to be “All Natural” but we deter away from using the same natural ingredient in its raw form. For instance, since people who have problematic and acne prone skin, always try to use face washes and creams that have Neem in it but ask them when was the last time they tried to use natural Neem leaves.. Well.. I know the answer! The problem I believe is WE ARE JUST LAZY! Sorry for being brutally honest.

I will be doing a separate blog post on “Why I started making my own products?” I am sure once you will read it, you will start doing the same! So, let’s not waste time and get back to our Magical Tree, and how to use Neem for Skin and Hair.

Some of the benefits of Neem:

  • Anti-bacterial properties
  • Anti-inflammatory properties
  • Anti-Cancer Properties
  • Boosts immunity
  • Contains Anti-Aging And Protective Antioxidants
  • Regenerative properties
  • Helps in fighting free radical damage
  • High in important fatty acids and vitamin E and can quickly penetrate outer layers of skin
  • Stimulates Collagen and so on

What are the Benefits of using Neem in a Face Mask?

  • Heals Scars
  • Fights Acne, Neem helps in reducing acne or pimples caused by bacteria
  • Treats Pigmentation
  • Exfoliates the skin
  • Works as an anti-inflammatory
  • Anti-ageing
  • Treats Skin Infections
  • Neem kills bacteria on the surface of the skin
  • Clear And Glowing Skin
  • Oil-control
  • Moisturizer (Yes) Neem is high in vitamin E and rich in fatty acids and will not dry out skin.
  • Neem works well with every skin type
How to make Neem powder at home

How to make Anti-Wrinkle Cream With Lavender and Neem Oil:

Ingredients:

  • ½ ounce of pure, organic neem oil
  • 8 ounces of organic jojoba oil
  • 4 –5 drops pure lavender oil
  • Place ingredients in a small bottle, shake well. Make sure all ingredients are well blended. Use it regularly.
  • For skin problems, apply directly onto the skin two or three times a day.You should not use undiluted neem oil on your skin. Always try a very small amount on a small area of skin to make sure your skin does not have a negative reaction.

To control acne using Neem Oil:

To use neem oil for acne control, warm a teaspoonful of coconut oil or olive oil and mix in 10 drops of organic cold-pressed neem oil. Apply on the face and wash it off after an hour, or leave it overnight, depending on your tolerance level. 

Neem for dandruff control:

Warm a teaspoon of organic cold-pressed neem oil and massage it gently into the scalp. Wash it off after half an hour. Again, if your scalp is very sensitive, neem oil may be diluted with an equal amount of coconut oil to prevent irritation.

How to use neem as a face-mask:

1. Neem + Tomato = Protects the skin against free radicals, improve texture and removes tan. 

Crush tomato into a pulp, add neem powder. Mix well and apply the mask to your face. Let your skin absorb its properties for 15 minutes and then rinse.

2. Neem + Honey + Tulsi  = Clears dirt deposits, kills pimple-causing bacteria

Take a handful of tulsi and neem leaves and dry them in shade. Once it is dry, crush it into a fine powder. Mix a tablespoon of honey to the powder. Apply the paste evenly to your face and neck. Wait till it dries, scrub in a circular motion and rinse.

3. Neem + Turmeric + Yogurt = Oil-controlling neem mask will make the skin clear of blemishes and marks. 

Mix 1 teaspoon of neem powder with 1 tablespoon yoghurt and a pinch of turmeric. Apply it on to your face. Wait till it dries and then rinse.

4. Neem + Apple Cider Vinegar + Honey = Removes spots from the skin.

Mix 1 teaspoon of neem powder, 1 tablespoon of apple cider vinegar and 1 teaspoon of honey together in a paste. Apply it to your face. Let it dry for 30 minutes. Scrub and rinse.

5. Neem + Rose Petals + Almond Oil + Rice Water = Mask with Bleaching properties that will make your skin turn fair, clear and makes the skin youthful. 

Mix 5 neem leaves, a handful of rose petals and 5 drops of almond oil, with a few drops of rose water. Grind it into a fine paste. Apply the mask and leave it on for 20 minutes. Rinse it with cold water.

6. Neem + Honey = Rejuvenates tired skin and removes excess oil from the skin. 

Crush a handful of neem leaves into a smooth paste, add a tablespoon of organic honey to the paste. Mix to blend well. Apply it to your face and neck. After 30 minutes, rinse.

7. Neem + Rosewater + Clay = Antibacterial properties that clear out blemishes and marks from the skin.

Dry a handful of neem leaves, crush it into a fine powder. Mix the powder and clay with the required amount of rose water to make a smooth paste. Apply it evenly to your face and neck. Rinse after 15 minutes.

8. Neem + Besan + Yogurt = Clears pimples, reduces marks and gives skin a radiant glow. 

Mix a tablespoon of gram flour, with a teaspoon of neem powder and a required amount of yoghurt to make a smooth paste. Cleanse your face and apply the mask. Let it stay for 15 minutes and then wash. Apply this DIY neem face mask twice a week to see results.

9. Neem + Papaya = Antibacterial mask that cleanses the skin, reduces breakouts and makes your skin glow. 

Crush a ripe papaya into pulp, add a teaspoon of neem powder to the pulp. Mix until the components combine well. Apply it to your face and neck. Leave it on for 30 minutes and then rinse.

10. Neem + Gram flour + Curd + Rose Water = Removes scars and blemishes

Mix all the ingredients in a bowl and mix to make a paste. Apply it all over your face. Leave it to dry and then wash.

Important Note-

Now that we have learnt how to use Neem for Skin and Hair, keep in mind that Neem is a very powerful herb, I remember when I got over-excited and used plain Neem with rosewater and it burned my face so bad! I recommend you use it sparsely, and like I always say, please do a patch test before using anything for the first time. Also, every skin is different and what may work for one might not work for another. Home remedies take time to show their effect, so be patient and consistent.